Edit a mesh point by point
After you make an object editable, you can drag its points, edges and faces by hand, pull new shapes out of its faces and cut new edges into it. Each tool and setting has a full entry in Mesh editing tools.
A SPHERE, BOX, CYLINDER, CONE, TORUS, PLATONIC, TEXT or GROWTH object can be made editable, and so can a loft drawn with the pen from two or more strokes. The other kinds have no MAKE EDITABLE (TAB) button, because Orbit cannot rebuild their shapes as faces that can be edited one by one. The result of a boolean or a split is an editable mesh already.
Make an object editable
Select the object and press Tab, or click MAKE EDITABLE (TAB) near the top of the INSPECTOR.
The object enters poly edit mode. The INSPECTOR shows how many faces and points the mesh has, in a line ending in VERTICES, and below it the buttons POINT V, EDGE E and FACE F. The button at the top reads EXIT POLY EDIT (TAB).
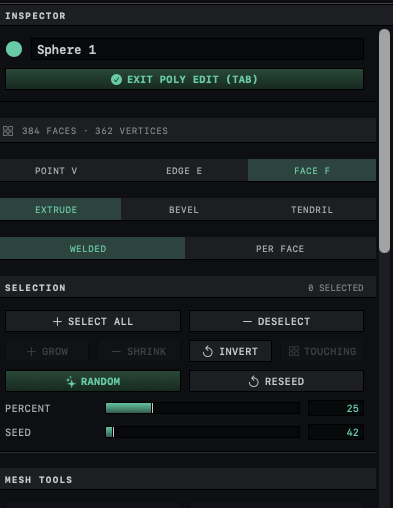
Press Tab again when you have finished editing.
The object leaves poly edit mode, and the INSPECTOR shows the banner MESH IS EDITED · PARAMETRIC LOCKED above the settings for the object's shape, which are dimmed.
The conversion bakes the shape the object has at that moment, deformers and ORGANIC smoothing included, into the mesh. Settings such as SEGMENTS stop having any effect, and the DEFORMERS list empties. ⌘Z right after the conversion gives back the object with its deformers and settings. Everything else the conversion changes is set out in Editable meshes.
From then on, Tab moves the object in and out of poly edit mode, and the button reads ENTER POLY EDIT (TAB) or EXIT POLY EDIT (TAB). The right-click menu and the command palette (⌘K) have the same commands as MAKE EDITABLE, ENTER POLY EDIT and EXIT POLY EDIT.
Choose points, edges or faces
Poly edit mode works on one kind of element at a time. Click POINT V, EDGE E or FACE F in the INSPECTOR, or press V, E or F. While the object is in poly edit mode, E and F choose edges and faces instead of the rotate tool and framing the view.
Click an element to select it. Hold Shift and click to add an element to the selection or take it out. Pressing Space clears the selection. In edge mode, double-clicking an edge selects the whole loop of edges it belongs to. Under SELECTION in the INSPECTOR, SELECT ALL and DESELECT act on the current kind of element. GROW and SHRINK change the selection by one ring, INVERT swaps selected and unselected elements and TOUCHING adds everything connected to the selection.
Move points and edges
- Press
Vfor points, orEfor edges. Drag a point or an edge.
It moves parallel to the screen. If it was part of the selection, the rest of the selection moves with it.
Hold Shift while you drag to snap to the cells of the floor grid. To circle the camera between drags, hold Option and drag.
With SOFT MAGNET turned on under MESH TOOLS, a drag pulls every point within RADIUS of the one you grab, whether or not those points are selected. The pull fades toward the edge of the radius. Press [ or ] to shrink or grow the radius.
Pull shapes out of faces
In face mode, a drag on a face changes the shape of the mesh. The EXTRUDE, BEVEL and TENDRIL buttons below the face and point counts choose what the drag does.
- Press
F, then click EXTRUDE, BEVEL or TENDRIL in the INSPECTOR. - Click a face. Hold Shift and click any others that should change with it.
Drag one of the selected faces.
The faces change as you drag, as the table below describes.
| Button | A drag on a face | Options |
|---|---|---|
| EXTRUDE | Moves the selected faces out of or into the surface, joined to the rest by new side walls. ⌘-drag insets them instead, setting a smaller copy of the selection inside its border. | WELDED lifts the selection as one piece; PER FACE lifts each face on its own. |
| BEVEL | Cuts the border of the selection back into a slanted strip, like a chamfered edge. | [ and ] set the number of facets in the strip, from 1 to 8. |
| TENDRIL | Draws a tube that follows the pointer out of the face. | SCALE /STEP below 1 narrows the tube toward a tip; TWIST /STEP turns it as it grows. |
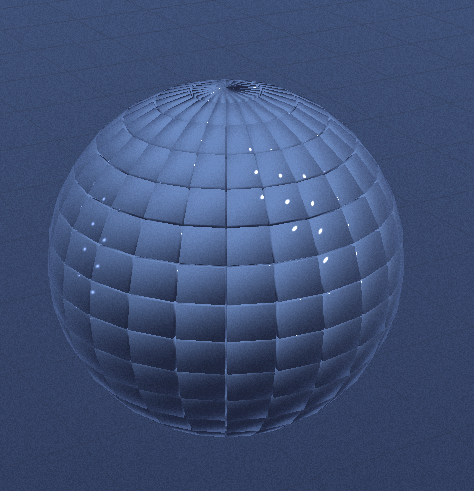
A drag that grabs an unselected face selects that face alone before it acts. The object itself stays where it is while you edit its mesh.
Main tools in each mode
The tools under MESH TOOLS and OPERATIONS in the INSPECTOR act on the selected elements of the current kind, and a tool that needs a selection stays dimmed until there is one. Each press of a tool, and each drag, is one undo step.
| Mode | Tool | What it does | What it needs |
|---|---|---|---|
| Points | WELD | Fuses the selected points into one at their center | Selected points |
| Edges and faces | COLLAPSE | Shrinks each selected edge or face to a single point | A selection |
| Any | FLATTEN | Lines up the selection on one flat plane | A selection with three or more points |
| Any | RELAX | Smooths the selection toward its neighbors; press again for more | A selection |
| Edges | LOOP CUT | Adds a new loop of edges through the band of faces with four sides beside the selected edge | A selected edge |
| Edges | KNIFE | Arms a cut; the next drag across the mesh slices each face it crosses | Nothing |
| Edges | BEVEL | Replaces each selected edge with a flat strip; SEGMENTS above 1 rounds it | Selected edges inside the mesh, not on a border |
| Faces | SUBDIVIDE | Splits each selected face into four | Selected faces |
| Faces | SPIKEY | Raises a spike from each selected face | Selected faces |
| Faces | BRIDGE | Joins two faces with a tunnel and removes both faces | Exactly two faces with the same number of sides and no point in common |
| Any | DELETE FACES | Removes the selected faces, leaving a hole | Selected faces |
Pressing Delete also removes the selected faces, in any mode. OPTIMIZE rebuilds the mesh with fewer faces, which helps before a boolean; with a selection, only that area gets fewer faces. Most changes to the selection, such as SELECT ALL or GROW, are not undo steps.
Return to the settings
RESET TO PARAMETRIC, in the MESH IS EDITED · PARAMETRIC LOCKED banner, trades the mesh for the object's settings. Click it, then click it again when it reads TAP AGAIN TO CONFIRM. Every change made to the mesh is discarded, and the object gets back its settings and baked-in deformers, along with the rest listed under Going back to the settings. ⌘Z right after the reset brings the edited mesh back.
On the result of a boolean or a split, the reset leaves a plain box, because such a result has no settings to return to.
Related: Mesh editing tools, Keyboard shortcuts and mouse gestures and Combine and cut objects with booleans.