Make a landscape at dusk
The Scene Wizard rolls a landscape at dusk, with ground rising out of a calm sea and a few plants on the slopes. You bring the low sun into the frame and add haze over the water, then save a render as a PNG file and the landscape as a scene file.
Any scene can be open. Opening the wizard clears the viewport, and CANCEL in the wizard brings back what was there.
Choose File ▸ New from Scene Wizard….
The SCENE WIZARD panel opens with LANDSCAPE selected under MODE, and the viewport clears.
If the WELCOME sheet is showing, click SCENE WIZARD on it instead.
Click the menu under ENVIRONMENT, which reads SURPRISE, and choose DUSK. Under WATER, click CALM, and under LIFE, click SPARSE.
With these choices each roll has a low sun, a calm sea and a scattering of plants. LANDSCAPE stays on SURPRISE, so the kind of ground changes from roll to roll.
Click ROLL.
Land and sea appear in the viewport behind the panel, under a dusk sky. SEED shows the number of this roll.
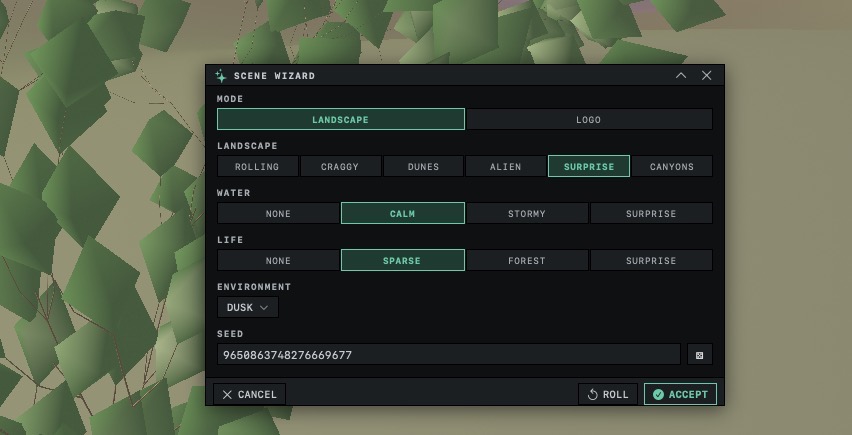
Click ROLL again for another landscape, as many times as you like. Between rolls, hold Option and drag in the viewport to see the landscape from other sides.
Each roll replaces the one before it.
Keep the MATERIAL BROWSER and the ENVIRONMENT BROWSER closed while the wizard is open. Opening either one, with
M,⌘Eor the ENVIRONMENT card, cancels the wizard and brings back the scene you had before it.Click ACCEPT when a roll looks right.
The panel closes. Orbit rebuilds the ground in finer detail, which can take a moment, and returns the camera to the view the roll chose.
ACCEPT builds the landscape from the pickers as they are when you click it. If you changed a picker after your last roll, click ROLL first.
Press F to frame the whole landscape.
The camera pulls back until the ground, the water and the plants are all in view. Hold Option and drag to choose the angle you want, and scroll to move closer.
At the bottom right of the window, click the ENVIRONMENT card, above the RENDER card. Drag the panel that opens by its title bar until you can see the landscape.
The right side of the ENVIRONMENT BROWSER shows the settings of the sky the wizard rolled. Each change appears in the viewport as you make it. Double-click the title bar to shrink the panel down to that bar while you look, and again to bring it back.
Avoid the cards under BUILT-IN on this scene. A card replaces the entire environment, including the fog, and none of the built-in cards turns on SUN LIGHT. A wizard landscape has no lights of its own, so clicking a card takes away its only light. If you click one by mistake, press
⌘Z.Under SUN, drag AZIMUTH slowly while you watch the viewport, until the sun sits inside the frame, low over the horizon.
The sun circles the sky at the same height as you drag. The light on the ground moves with it, because AZIMUTH aims both the sun disc and the sunlight.
The wizard points the camera in a random direction, so the sun often starts outside the frame. VISIBLE SUN DISC is already on after a DUSK roll. If the disc hides behind a hill or sits above the top of the frame, change ELEVATION by a few degrees.
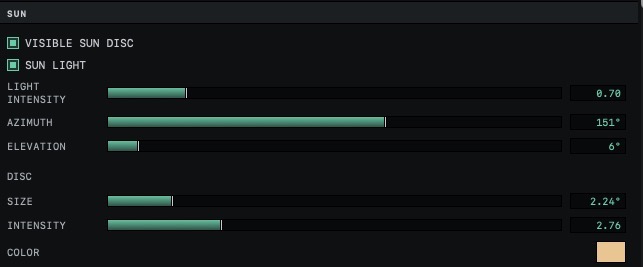
Under OUTER CORONA, raise INTENSITY.
The wide glow around the sun grows brighter in the viewport sky. SIZE, directly above INTENSITY, spreads it farther across the sky.
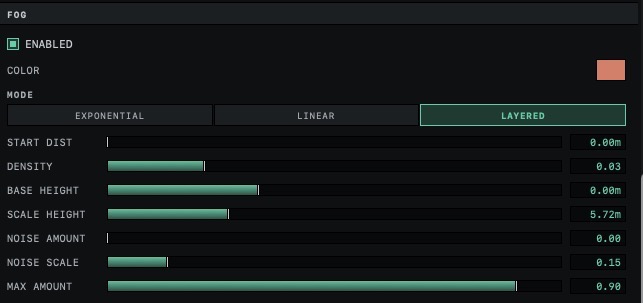
Under FOG, turn on ENABLED if it is off, then click LAYERED under MODE.
BASE HEIGHT and SCALE HEIGHT appear among the fog settings. Layered fog has the DENSITY value at BASE HEIGHT, grows thicker below it and thins out above it, so it collects in low places.
Set START DIST to 0, BASE HEIGHT to 0, SCALE HEIGHT to 2 and DENSITY to 0.05, each by clicking the number at the right end of its slider, typing the value and pressing Return.
The haze settles into the low parts of the landscape and over the water.
These numbers are a starting point for adjusting by eye. Raise DENSITY for thicker haze, or lower SCALE HEIGHT to keep it closer to the ground. START DIST is in the list because a dusk roll sometimes arrives with fog already on, and a rolled START DIST above 0 leaves the nearest part of the view clear.
Close the ENVIRONMENT BROWSER with the X in its title bar and click the RENDER card. Under PRESET, click TERRA '96, then click DONE.
The card reads Terra '96. In this look, jagged edges such as a ridge against the sky are smoothed, and the picture gets a fine grain.
Click EXPORT RENDER in the toolbar. In the sheet, click RENDER.
When the picture is complete, SAVE IMAGE appears.
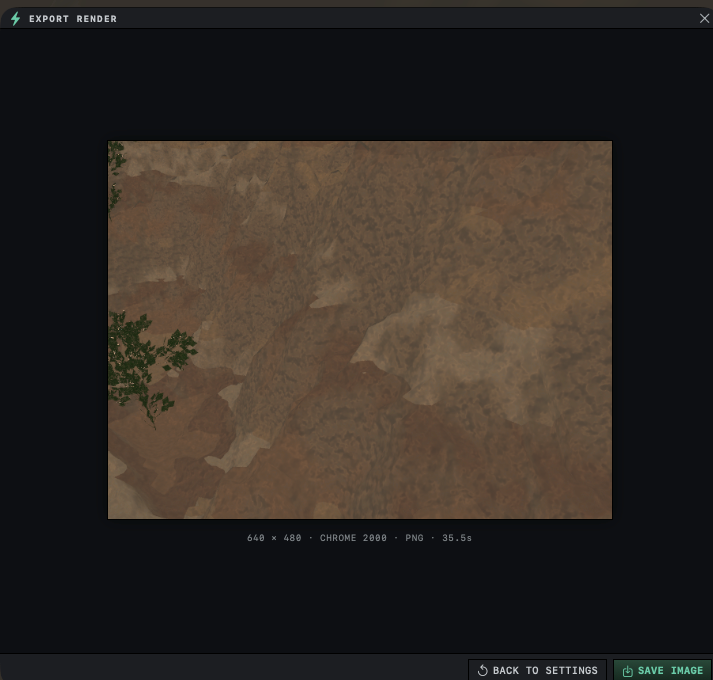
Click SAVE IMAGE, choose a folder and click Save.
The picture file goes into the folder you chose. The landscape itself is not in a file yet; the next step saves it.
Choose File ▸ Save Scene As…, type a name, choose a folder and click Save.
Orbit saves the landscape, with its sky, sun and fog, as a scene file ending in
.orbit.Save Scene As… always asks for a name. If a saved scene was open before you started the wizard,
⌘Swould write the landscape over that file.
The scene file does not hold TERRA '96. Like the other render settings, the look remains in effect for every scene until you choose another. Set the sky, sun, fog and clouds describes the rest of the ENVIRONMENT BROWSER, and Start from an example or the Scene Wizard covers the wizard's other choices.
The seed of a roll
The seed and the four pickers together decide what the wizard builds. Write down the number in SEED before you click ACCEPT, because SEED starts empty the next time the panel opens. To build that landscape again, open the wizard, set the same pickers, type the number into SEED and click ROLL. The seed brings back the roll as the wizard made it. Changes you made afterward, such as the sun and the fog, are kept only in the saved scene.
The sky as a preset
SAVE AS PRESET, at the bottom of the ENVIRONMENT BROWSER, stores the current sky, sun and fog as a new card under USER PRESETS. Clicking that card on another scene gives it the same sky, with SUN LIGHT on. While the preset is applied, the browser shows EDITS UPDATE THIS PRESET, and each further change to the sky is saved into the preset. Naming, sorting and sharing presets are covered in Save your own presets.
Next: Make a looping ocean GIF.