Push and pull a shape by hand
Two deformers let you shape an object directly in the viewport. MAGNET PULL raises bumps or presses dents where you drag on the surface. CAGE surrounds the object with a lattice of points, and moving those points stretches, squeezes or leans the part of the object inside them.
Both start from ADD DEFORMER, in the DEFORMERS section of the INSPECTOR, with one object selected. Like any deformer, each one sits in the stack and works on the shape the rows above it produced. See Bend, twist and melt objects with deformers for how the stack works.
Sculpt with MAGNET PULL
Click ADD DEFORMER and choose MAGNET PULL.
A Magnet Pull row appears with SCULPT and CLEAR buttons and the line NO SCULPT POINTS. CLICK SCULPT TO BEGIN.
Click SCULPT.
The button changes to DONE SCULPTING, the BRUSH R and BRUSH STR sliders appear under it, and a banner at the top of the viewport starts with "Sculpt Mode".
Press on the object and drag away from its surface.
The surface around the spot where the drag started swells outward. A longer drag pulls it further. Drag into the surface to press a dent. Each drag places one sculpt point, and the row counts them.
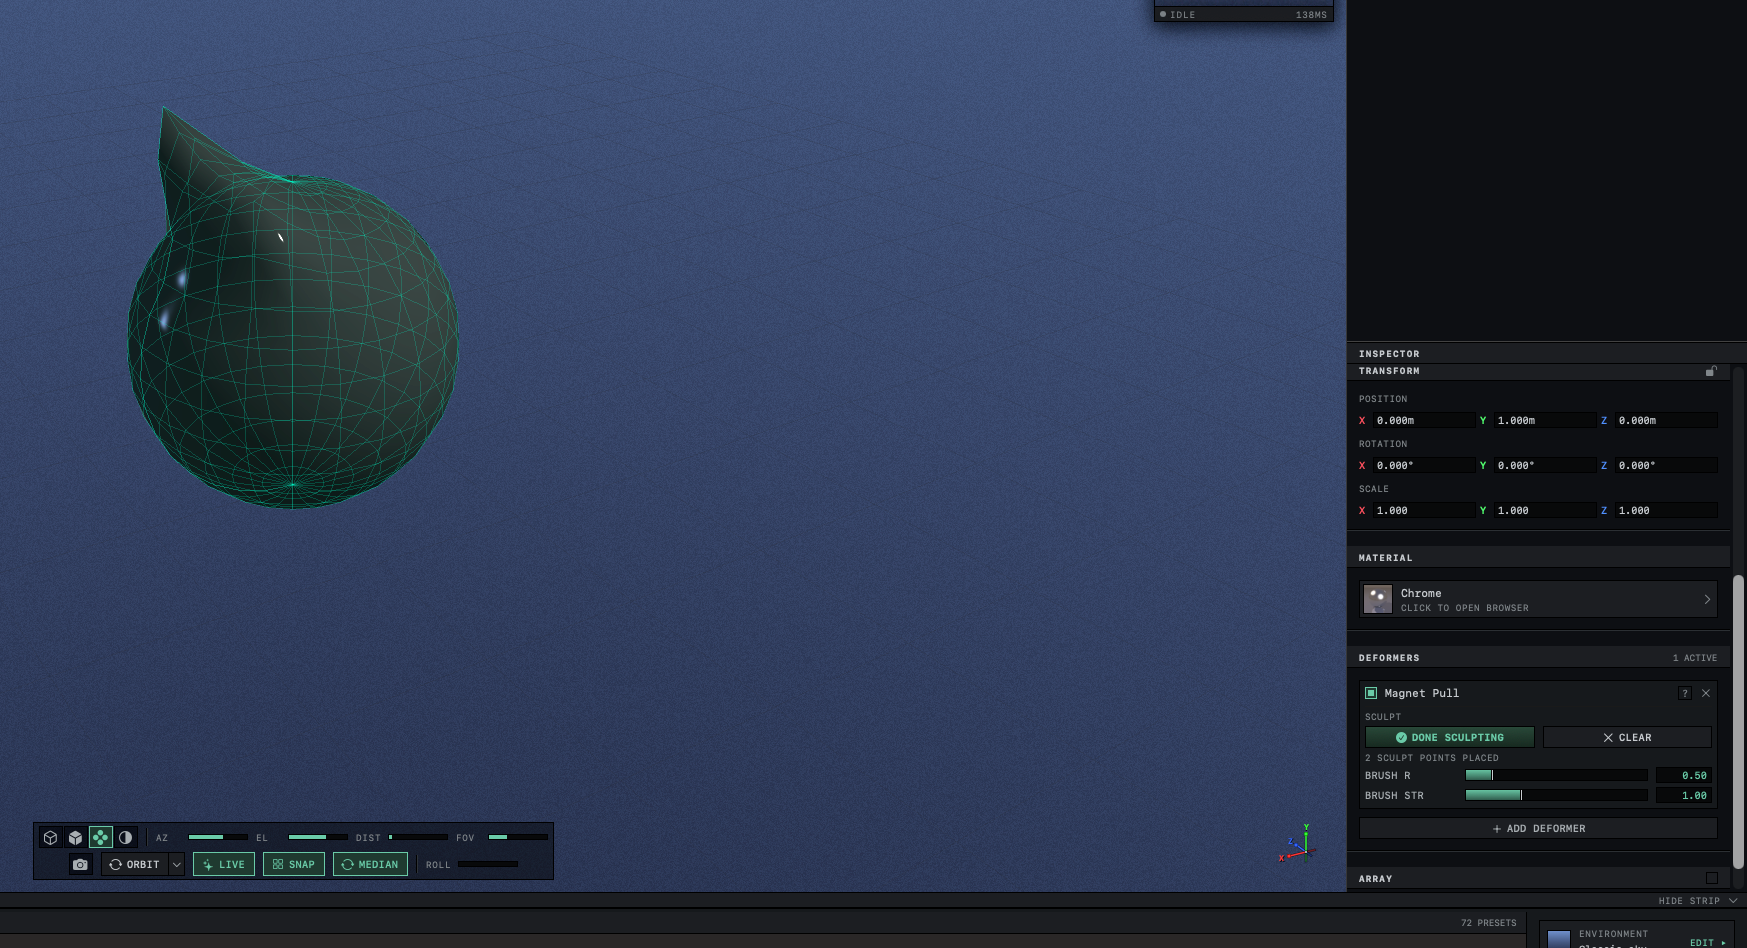
- Set the brush for the next drag. Scroll, or drag BRUSH R, to change the radius of the area that moves. Hold Shift and scroll, or drag BRUSH STR, to change how strongly it moves.
Click DONE SCULPTING, or press Esc.
The sliders fold away and the viewport returns to selecting and moving objects.
While sculpt mode is on, hold Option and drag to circle around the object. Scrolling sets the brush and does not zoom. ⌘Z takes back the last drag. CLEAR removes every sculpt point of this deformer, whether or not sculpt mode is on, and a single ⌘Z restores them.
A pull moves the points the object already has. On a sphere, higher SIDES and SEGMENTS in the GEOMETRY section give smoother, rounder bumps.
BRUSH R and BRUSH STR set the drags you make after changing them; points already placed keep the size and strength they were made with. Orbit does not save the brush settings. They return to their defaults when you start or open a scene, and the next time you open Orbit. The sculpt points are saved with the scene.
Reshape with a CAGE
The lattice fits around the object when you add the deformer, a little larger than the object on every side. It is built around the object's own shape, before any deformers.
Choose the number of points before you move any. GRID X, GRID Y and GRID Z set the points along each direction, from 2 to 5, with 3 to start.
The row shows the total, such as 27 POINTS.
Changing a GRID value rebuilds the lattice and loses every point you have moved.
⌘Zrestores them.Click EDIT CAGE.
The button changes to DONE EDITING, and the lattice and its points appear around the object. They show only while cage edit mode is on.
Select points. Click a point to select it, and hold Shift while you click to add or remove points. Drag across empty space to select every point inside a box, holding Shift to add them to the points already selected.
The row shows how many points are selected.
Drag one of the selected points.
All the selected points move together parallel to the screen, and the object bends with them. Hold Shift while dragging to move them straight up or down.
Click DONE EDITING, or press Esc.
The lattice and its points disappear, and the object keeps its new shape.
In cage edit mode, a click never selects an object. Hold Option and drag to circle around. ⌘Z takes back one point drag at a time. RESET CAGE puts every point back where it started.
A lattice with few points makes broad changes, such as leaning the top of the object or pinching its middle. More points let you move a smaller part. The moved points and the GRID values are saved with the scene.
Leaving sculpt or cage edit mode
Sculpt mode and cage edit mode also end when you select a different object or switch to Loop Studio. Adding or removing a deformer ends them too. Neither mode is saved, so a scene always opens with both off.
Leaving a mode keeps the shape. The sculpt points and the moved lattice points stay in their deformer, and you can go back in to change them later. The checkbox at the left of the row switches the effect off without discarding the points. The ✕ removes the deformer and its points together, and ⌘Z brings them back.
MAKE EDITABLE (TAB) bakes the shaped object into an editable mesh and removes the deformer. The keys for both modes are listed in Keyboard shortcuts and mouse gestures.