Move the camera and change views
The camera in Orbit looks at one point in the scene and circles around it. With the mouse and a few keys you swing it around that point and move it closer or farther away. Other keys give a flat view from the top, front or side, or bring the whole scene back into view when it has drifted off screen. The controls panel at the bottom of the viewport sets the camera with sliders and can spin it on its own.
Circle, zoom and pan
Hold Option and drag in the viewport.
The camera swings around the point it looks at. Dragging up or down raises or lowers it, and it stops one degree short of looking straight down or straight up.
A drag without Option selects the object under the pointer, or does nothing if it starts over empty space.
Scroll with a mouse wheel, or with two fingers on a trackpad.
The camera moves toward the point it looks at or away from it. Holding Option and dragging with the right mouse button zooms as well.
Hold down the middle mouse button and drag.
The view slides sideways, and the point the camera circles slides with it.
Panning works only with a middle mouse button, so a trackpad cannot pan. To move the point the camera circles without panning, select the object you want at the center and press F.
Undo does not record camera moves, so ⌘Z leaves the view where it is. A view worth coming back to can be kept as a camera snapshot.
Center the view on an object
Click the object, then press
F.The camera glides until the object sits in the middle of the view with some room around it. From then on, Option and drag circles around that object.
With a group selected,
Fframes all of its members. With a light selected, the camera centers on the light from close by. Right-clicking an object and choosing FOCUS does the same asF.To see the whole scene, press Space to clear the selection, then press
F.The camera moves until every visible object fits in the view. Right-clicking empty space in the viewport and choosing FRAME SCENE gives the same view.
In poly edit, F switches to selecting faces and does not move the camera.
Look from the top, front or side
The chips P, T, F and S at the top left of the viewport, and the keys 1 to 4, switch between the perspective view and three flat views. A flat view has no perspective, so nearer parts of the scene do not look larger than farther ones.
Press
2, or click T.The camera looks straight down, and TOP appears at the top of the viewport.
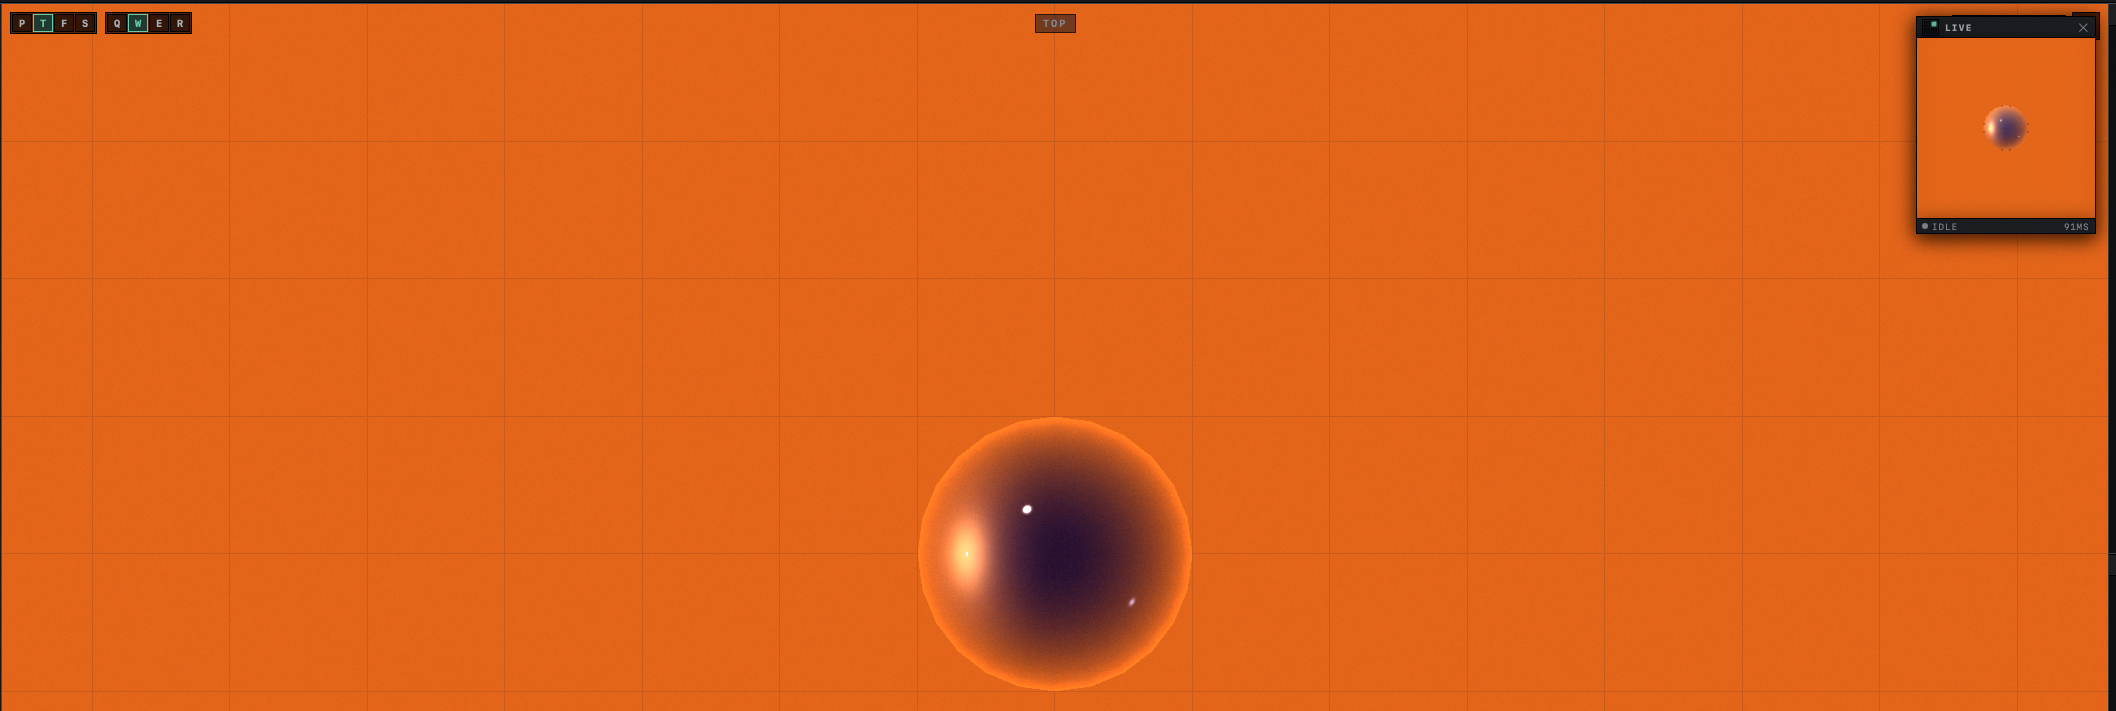
Press
2again, or click T again.The view turns over to look straight up, and the label reads BOTTOM. The front view,
3, turns to BACK the same way, and the side view,4, turns from RIGHT to LEFT.Press
1, or click P.The perspective view comes back as you left it.
Each of the four views keeps its own framing while Orbit is open, so you can switch back and forth without losing your place. File ▸ New Scene and opening a scene reset them.
Scrolling zooms and the middle button pans in a flat view as well. Holding Option and dragging turns the flat view into a perspective view, starting from the same angle.
Set the camera with the controls panel
The controls panel sits at the bottom center of the viewport. Its camera sliders are narrow tracks without numbers. Click a point on a track to jump to that value, or drag along it.

| Slider | Range | At the start | What it changes |
|---|---|---|---|
| AZ | −180° to 180° | 30° | The direction the camera looks from, as it circles the scene. Dimmed in flat views. |
| EL | −89° to 89° | 25° | How high the camera sits above the scene, or how far below it. Dimmed in flat views. |
| DIST | 1 to 100, more in a large scene | 8 | How far the camera is from the point it looks at. In a flat view, how tall the visible area is. |
| FOV | 10° to 120° | 45° | How wide the view is. A higher value takes in more of the scene. Dimmed in flat views. |
| ROLL | −45° to 45° | 0° | Tilts the horizon. Works in flat views too. |
To level the horizon, double-click the ROLL track. Holding Option and Shift while you drag sideways in the viewport also rolls the camera.
Saving the scene stores the camera with it, so the scene opens with the same view.
Spin the camera automatically
Click ORBIT in the controls panel.
The camera circles the scene without stopping, and the button reads ORBIT 6s, the time one turn takes.
To change the speed, right-click ORBIT, or click the small arrow beside it, and choose a speed from 3 SECONDS / ROTATION to 30 SECONDS / ROTATION.
The camera turns at the new speed. Choosing a speed also starts the spin when it is off.
Click ORBIT again to stop.
The camera stays at the angle it had reached.
The spin also stops when you circle, roll, scroll or pan by hand, and when you switch to another app. ORBIT cannot be clicked in the flat views, because those views face a fixed direction. EXPORT TURNTABLE…, the last item of the speed menu, opens the export for a spinning shot; see Export a turntable.
Give the viewport more room
Press
⌘0, or click the button in the top right corner of the viewport.The column of object buttons on the left, the OBJECTS list and the INSPECTOR are hidden, and the viewport fills the middle of the window. Press
⌘0again to bring them back. Each time Orbit starts, they are showing.Press
⌘J, or click the bar reading HIDE STRIP above the dock, the strip of materials and snapshots at the bottom of the window.The dock is hidden, and the bar reads MATERIALS / SNAPSHOTS / ENVIRONMENT. Click the bar or press
⌘Jto show the dock again. Orbit remembers whether the dock was hidden the next time it starts.
The CAMERA section of SETTINGS sets how fast the camera circles, pans and zooms. It can also reverse the direction of circling and of scroll zoom. Those switches are in App settings, and the camera gestures are gathered on one page in Keyboard shortcuts and mouse gestures.