The viewport, the preview and the render
The viewport, the large view you work in, redraws as you drag the camera and shows no shadows. A small ray traced copy of the same view, the LIVE preview, redraws in a corner of the viewport each time you pause. EXPORT RENDER traces the picture you save, at full size and with shadows, reflections and the render look.
The viewport
The Mac's graphics processor draws the viewport one object at a time. While it draws an object, it has no record of where the others are, so it cannot tell when one of them blocks a light or belongs in another's reflection. The viewport therefore draws no shadows, and no object appears reflected in another. The softness of an area light comes from the edges of its shadows, so without shadows the viewport lights the scene from the center of the light's panel, as if the area light were a point.
Four icons at the left end of the controls panel, at the bottom of the viewport, choose what the viewport draws. Hold the pointer over an icon to see its name.

| View | What the viewport draws |
|---|---|
| Wireframe | The edges of each object as lines, unlit. No sky and no ground plane. Water appears as a grid of lines. |
| Flat | Objects lit by the scene's lights, with each triangle lit as one flat facet, which shows how the surface is built. With SURFACE set to GOURAUD, triangles are lit at their corners instead. No sky and no ground plane. Water appears as a grid of lines. |
| Shaded | Objects lit by the scene's lights, with the sky, the ground plane and water. Objects show no reflections. Orbit starts in this view. |
| Material | Everything Shaded draws, plus the sky reflected on reflective objects, strongest toward their outlines. |
Material is the only view that puts reflections on objects, and they reflect only the sky. A reflective ground plane and water mirror the sky in Shaded as well. One object reflected in another appears only in the LIVE preview and the render.
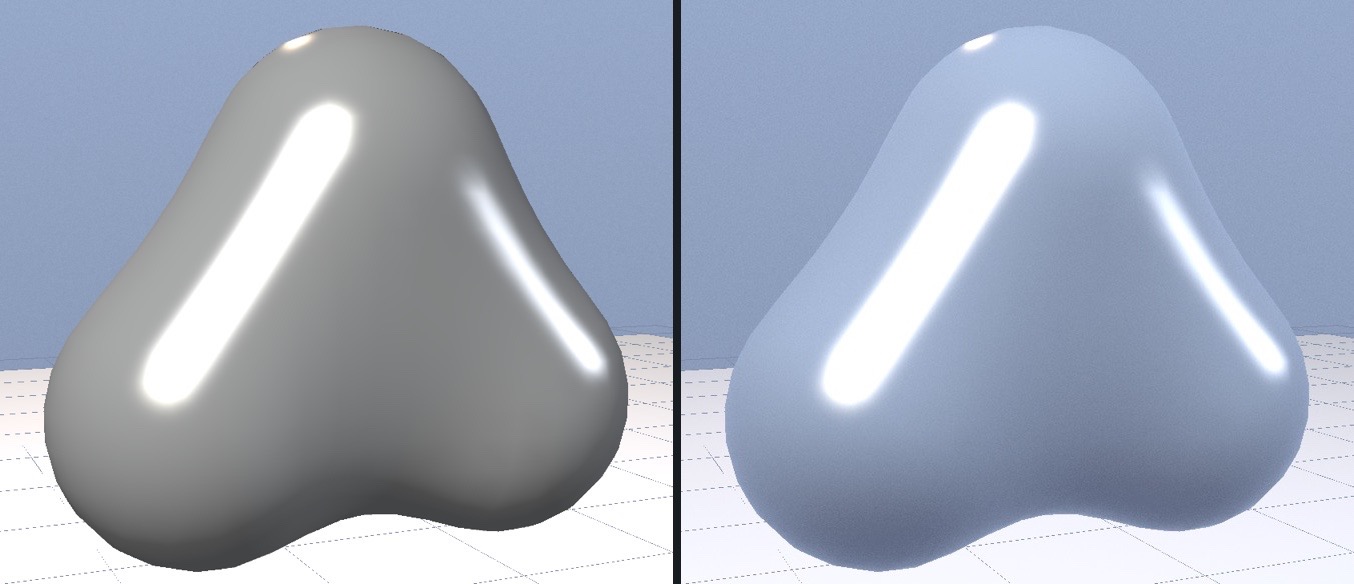
The viewport follows three settings of the render look, GAMMA, SURFACE and SPECULAR, and the limit the look puts on how small a highlight can get. As a result, RAY '95 and TERRA '96 darken the viewport's midtones as they darken the render's, and GLIDE '99 lights the viewport at the corners of each triangle and blends the color across it, as it does in the render. Grain, color banding, smoothed edges, glow and lens flare appear only in traced pictures.
The viewport uses at most eight lights. When SUN LIGHT is on, the sun takes the first of those places, and the scene's lights fill the rest in the order they were added. A light past the eighth still lights the preview and the render. While a light is selected, the viewport lights objects with that light alone and shows Light preview (no shadows) at the bottom left.
The view mode affects the viewport alone. The preview and the render ignore it and the scene file does not store it. Opening a scene or choosing NEW SCENE returns the viewport to Shaded.
The LIVE preview
Click LIVE in the controls panel to open the preview. It appears in the top right corner of the viewport, or in the corner you last moved it to. Click a square in the small grid at the left of its title bar to move it to another corner, and click the X at the right, or LIVE again, to close it. Orbit remembers whether the preview is open, and in which corner, from one launch to the next.
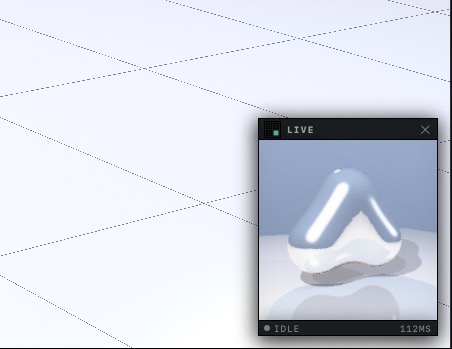
The preview uses the same ray tracer as the render, on a picture 160 pixels square. Because it is traced, it shows shadows, objects in reflections and every light in the scene. The render settings apply to it too, and the render look, anti-aliasing, glow and lens flare appear in it as they will in the render. Tracing runs on half of the Mac's processor cores at low priority, which helps keep the viewport responsive while the preview works.
It draws once when you open it. After that, a change to the scene, its lights, the camera or the render settings starts a new trace 350 milliseconds after the last change, and a change that would leave the picture the same is skipped. While you drag the camera, or while ORBIT turns it, the preview stops and waits, then draws once when the camera comes to rest. The line under the picture reads QUEUED while a trace waits, RENDERING… while it runs and IDLE otherwise, with the time of the last trace in milliseconds at its right end.
The preview is square and shows the same height of the scene as the render, so a wide render such as 1920 × 1080 takes in more at the left and right. It never shows depth of field or WIREFRAME MODE. The panel enlarges the 160 pixel picture slightly and smooths it, which softens detail as small as one pixel, such as dither. In the free version the preview carries the Made with Orbit 3D mark in its corner, and the second mark is too wide to fit.
EXPORT RENDER
EXPORT RENDER, near the right end of the toolbar, opens a sheet where you choose the size and the file format. RENDER then traces the picture at that size, and it fills in tile by tile until SAVE IMAGE appears. Every setting in RENDER SETTINGS applies. The render look brings its own anti-aliasing, dither and color depth. Glow and lens flare appear when they are on, and depth of field appears only here. TERRA '96, CHROME 2000 and RADIOSITY '96 smooth the stepped edges of objects, and the look Orbit starts with does not.
Lights with SHADOWS checked in the INSPECTOR cast shadows in the render, and reflections include other objects, up to the number of bounces set by REFL DEPTH. Area lights cast soft shadows, except under RAY '95, TERRA '96 and GLIDE '99, which give them hard edges. The era looks describes what else each look changes.
In the free version each saved image also carries two marks, shown in The free and full versions.
Comparing the three pictures
| To see | Viewport | LIVE preview | EXPORT RENDER |
|---|---|---|---|
| Shape, position and size | Yes | Yes, at 160 × 160 | Yes |
| Shadows | No | Yes | Yes |
| The sky in reflections | Material view, plus the ground plane and water in Shaded | Yes | Yes |
| Objects in reflections | No | Yes | Yes |
| Soft shadows from area lights | No | As in the render | Depends on the look |
| Scenes with more than eight lights | First eight lights | All lights | All lights |
| Grain, banding, smoothed edges, glow and lens flare | No | Yes, at 160 × 160 | Yes |
| Depth of field | No | No | Yes |
| The edges of the picture | With RENDER FRAME on | Square | Yes |
| The free version's marks | None | Corner mark | Both marks |
| When it redraws | As you work | 350 ms after the last change | When you click RENDER |
The viewport is the place to build, since it redraws as you drag and Wireframe and Flat show how a shape is made. Keep the preview open while you set lights and materials, because it is the first picture that shows their shadows and reflections. Before you call a picture finished, check it with EXPORT RENDER. Only the render works at the final size, and small things such as dither, thin edges and distant highlights can differ at 160 pixels. To see where the render's edges fall in the viewport, turn on RENDER FRAME, as described in Frame the shot.
See reflections before you render
In the controls panel at the bottom of the viewport, click the fourth view icon, Material.
Reflective objects mirror the sky. Other objects do not appear in them.
In the same panel, click LIVE, unless the preview is already open.
The preview opens in the top right corner of the viewport, or in the corner you last moved it to, and traces the scene with shadows and with objects in the reflections.
Hold Option and drag in the viewport to move the camera, then let go.
The preview waits while the camera moves and redraws after you let go.
Render settings and scene files
Orbit keeps its render settings in its own preferences, apart from any scene. They include the render look, anti-aliasing, the effects and the size and format chosen in EXPORT RENDER. Because they are preferences, they stay as you left them from one launch to the next and apply to every scene you open. A .orbit scene file contains none of them, so a scene made on another Mac renders in whatever look you have set, which may not be the one it was made for.
The examples that come with Orbit name the look they were built for when they open, and offer APPLY LOOK or KEEP CURRENT. Undo records no change to the render settings; to return to an earlier look, choose it again under PRESET in RENDER SETTINGS.
Related: Choose a render look, Preview the render while you work, Render and save an image and Render settings.