Build a spiky sculpture on a checkered floor
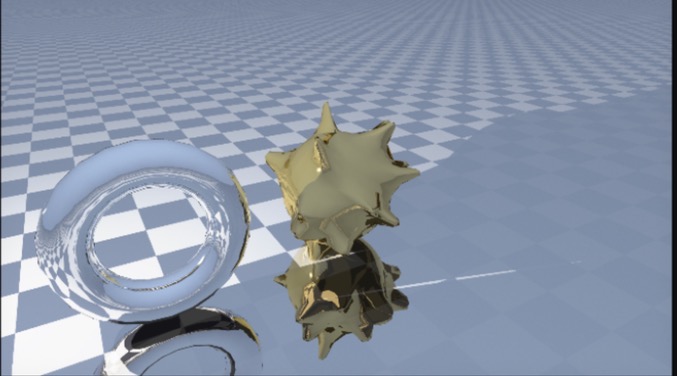
The finished picture shows a spiky gold sphere and a chrome torus (a ring shape) standing beside it on a reflective checkered floor. After building and lighting the pair, you render the picture and save the scene as a file.
Choose File ▸ New Scene.
The viewport shows the floor grid with no objects on it.
If Orbit asks whether to save the current scene, click Save… or Discard. If the WELCOME sheet is showing, click NEW SCENE on it instead.
Click ADD OBJECT in the toolbar and choose SPHERE.
Sphere 1 appears at the center of the grid, sitting on it and already selected. The INSPECTOR on the right shows its settings.
In the INSPECTOR, scroll down to DEFORMERS, click ADD DEFORMER and choose SPIKE EXTRUSION, under TOPOLOGY near the end of the menu.
Spikes grow out of the sphere, and a row named Spike Extrusion appears under DEFORMERS.
A deformer changes the shape of an object by a rule, such as a bend, a twist or a set of spikes. Its settings stay editable, and the object underneath is still a sphere.
Click ADD DEFORMER again and choose SMOOTH.
A Smooth row appears below Spike Extrusion, and the spikes round off.
Deformers run in order from the top of the list to the bottom, so SMOOTH works on the sphere after the spikes have grown. Orbit always adds a new deformer at the bottom, and the list cannot be reordered. Add deformers in the order you want them to run. The ✕ at the right end of a row removes that deformer.
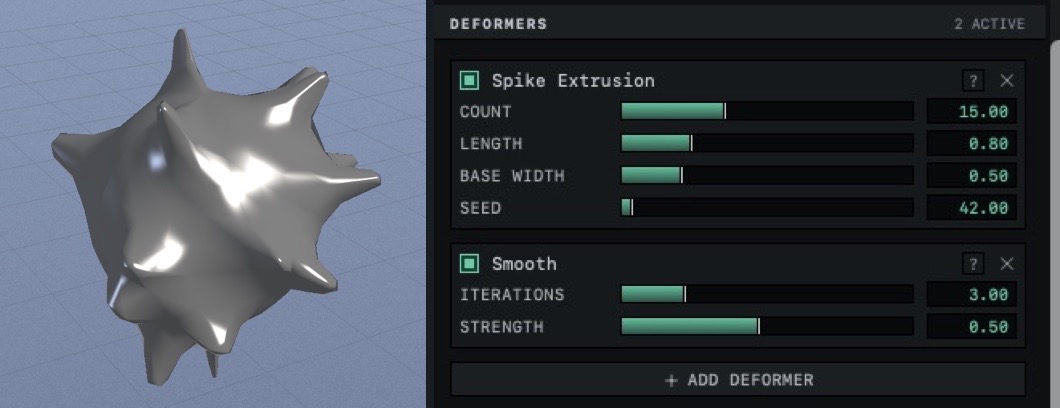
In the Spike Extrusion row, set LENGTH to about 1.5, then drag SEED until you like where the spikes are.
The spikes grow longer. Each SEED value places them differently, and the same value always gives the same arrangement.
To type a value, click the number at the right end of a slider, type the value and press Return.
Click the MATERIALS tab in the dock at the bottom of the window, then click Gold.
The sphere turns gold.
A card in the MATERIALS strip gives its material to every selected object, and the cards are dimmed while nothing is selected.
In the controls panel at the bottom of the viewport, click Material, the last of the four view icons.
The gold sphere reflects the sky.
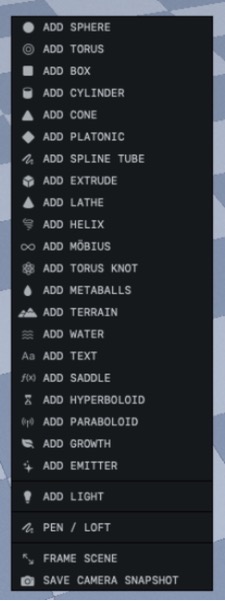
Right-click the grid a short way to the left of the sphere and choose ADD TORUS.
Torus 1 appears where you clicked, lying flat on the grid, and is selected.
The torus already looks like chrome. A new torus, like most new objects, starts with the same material as the Chrome card, so clicking Chrome on it changes nothing you can see. Aim at the grid itself, because the same click on an object opens a menu of commands for that object.
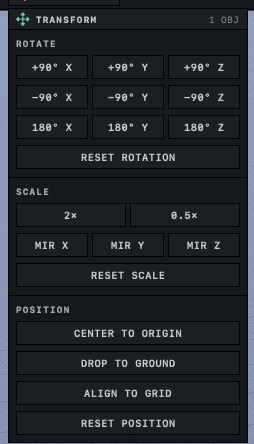
Click TRANSFORM in the toolbar. In the panel that opens, click +90° X, then DROP TO GROUND, then click outside the panel to close it.
+90° X stands the torus on its edge, partly sunk below the grid, and DROP TO GROUND lifts it until its lowest point rests on the grid.
Drag the red arrow on the torus to slide it closer to the sphere or farther away, until the two stand side by side without touching.
The torus follows the arrow as you drag.
Dragging the body of the torus only selects it, so use the arrows to move it. Red and blue slide an object across the floor, and green lifts or lowers it. If no arrows show, press
W.Click LIGHTING in the toolbar and choose DRAMATIC.
Orbit removes every light the scene had and puts in the two lights of DRAMATIC, a strong light low on one side that casts shadows and a faint one that does not. Nothing is selected afterward.
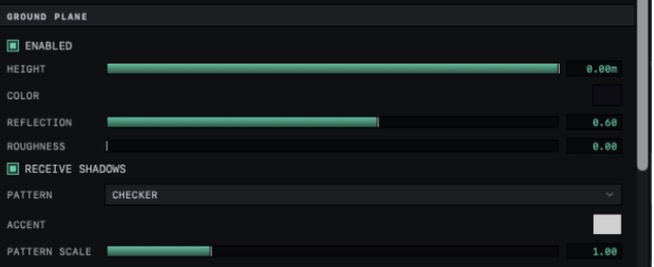
⌘Zbrings back the lights you had before.At the bottom right of the window, click the ENVIRONMENT card, above the RENDER card. In the settings on the right of the panel that opens, scroll down to GROUND PLANE and click the box beside ENABLED.
The ENVIRONMENT BROWSER is open, and a floor appears at the level of the grid.
Click the menu beside PATTERN, which reads SOLID, and choose CHECKER. Then click the ACCENT swatch, type
#D0D0D0in the HEX field, press Return and click outside the color panel.The floor turns into a checkerboard of dark and light squares.
The floor starts out partly mirrored, with REFLECTION at 0.60. Lower it for plainer squares and a weaker mirror.
Close the panel with the X at the right end of its title bar. If the LIVE preview is not open, click LIVE in the controls panel.
Unlike the viewport, the preview shows the shadows on the floor, and the sphere, the torus and the floor reflected in one another.
If one object sits in the other's shadow, click the torus and drag its red arrow until both are lit. The preview redraws each time you stop.
Click the RENDER card, below the ENVIRONMENT card. Under PRESET, click CHROME 2000, then click DONE.
The card reads Chrome 2000, a look with smooth edges and stronger reflections at glancing angles.
Click EXPORT RENDER in the toolbar, then click RENDER. When SAVE IMAGE appears, click it, choose a folder and click Save.
The saved picture has the shadows and reflections the preview showed, at the size chosen in the sheet.
Press
⌘S, type a name for the scene, choose a folder and click Save.The window title changes to the file name, which ends in
.orbit.The first save of a new scene asks for a name and a place, starting from
Untitled Scene.orbit. After that,⌘Ssaves to the same file without asking.
The saved scene file
The scene file keeps the sphere and the torus with their deformers and materials, the lights, the floor and the camera. Chrome 2000 is not in it, because Orbit keeps the render look with its other render settings.
The sphere in the file is still a sphere with two deformers. Open the scene, click the sphere and change SIDES under GEOMETRY, or any slider in a deformer row, and Orbit rebuilds the spikes and the smoothing from the new numbers.
The checkered floor
The checkered floor is part of the scene's environment, like the sky, the sun and fog. It is not an object, so it has no row under OBJECTS, and you change it in the ENVIRONMENT BROWSER. Clicking one of the preset cards on the left of that panel replaces the whole environment, floor included, with the preset's own. Press ⌘Z if that happens by accident.
Next: Make a landscape at dusk.