Light a scene
A lighting preset swaps the lights of a scene for a ready set. You can also add point, spot and area lights one at a time, aim them at objects and set their color, brightness and shadows. The sun, set in the ENVIRONMENT BROWSER, lights the scene separately from all of these.
A new scene starts with two point lights, Key Light and Fill Light. To start new scenes with no lights, open SETTINGS and, under NEW SCENE, set LIGHTS to EMPTY.
Choose a lighting preset
Click LIGHTING in the toolbar and choose a preset, such as THREE-POINT.
The lights in OBJECTS are replaced by the lights of the preset, and nothing is selected.
| Preset | Lights it adds |
|---|---|
| THREE-POINT | Key Light, the brightest and the only one with shadows, a dim Fill Light and a Rim Light |
| DRAMATIC | A very strong, low Key Light and a faint Fill Light |
| STUDIO | Top Light, a square area light overhead pointing straight down, and a weaker Front Light |
| NEON | An orange light and a blue light on opposite sides of the scene |
| BACKLIT | A strong Back Light and a faint light named Ambient |
| VOID | A single Key Light |
A preset replaces every light in the scene, including lights you added or changed, and one ⌘Z brings back the lights you had. To combine a preset with other lights, choose the preset first and add the rest afterwards. The sun is not affected.
Add a light and aim it
- Click the object the light should shine on.
Click ADD OBJECT in the toolbar and choose LIGHT.
A point light named Light and a number appears 6 meters above the ground and is selected. The INSPECTOR shows LIGHT · POINT. While a light is selected, the viewport lights the scene with that light alone and shows Light preview (no shadows) at the bottom left.
The new light is set to aim at the object you selected. A point light shines in every direction and ignores its aim, but a spot or area light uses it.
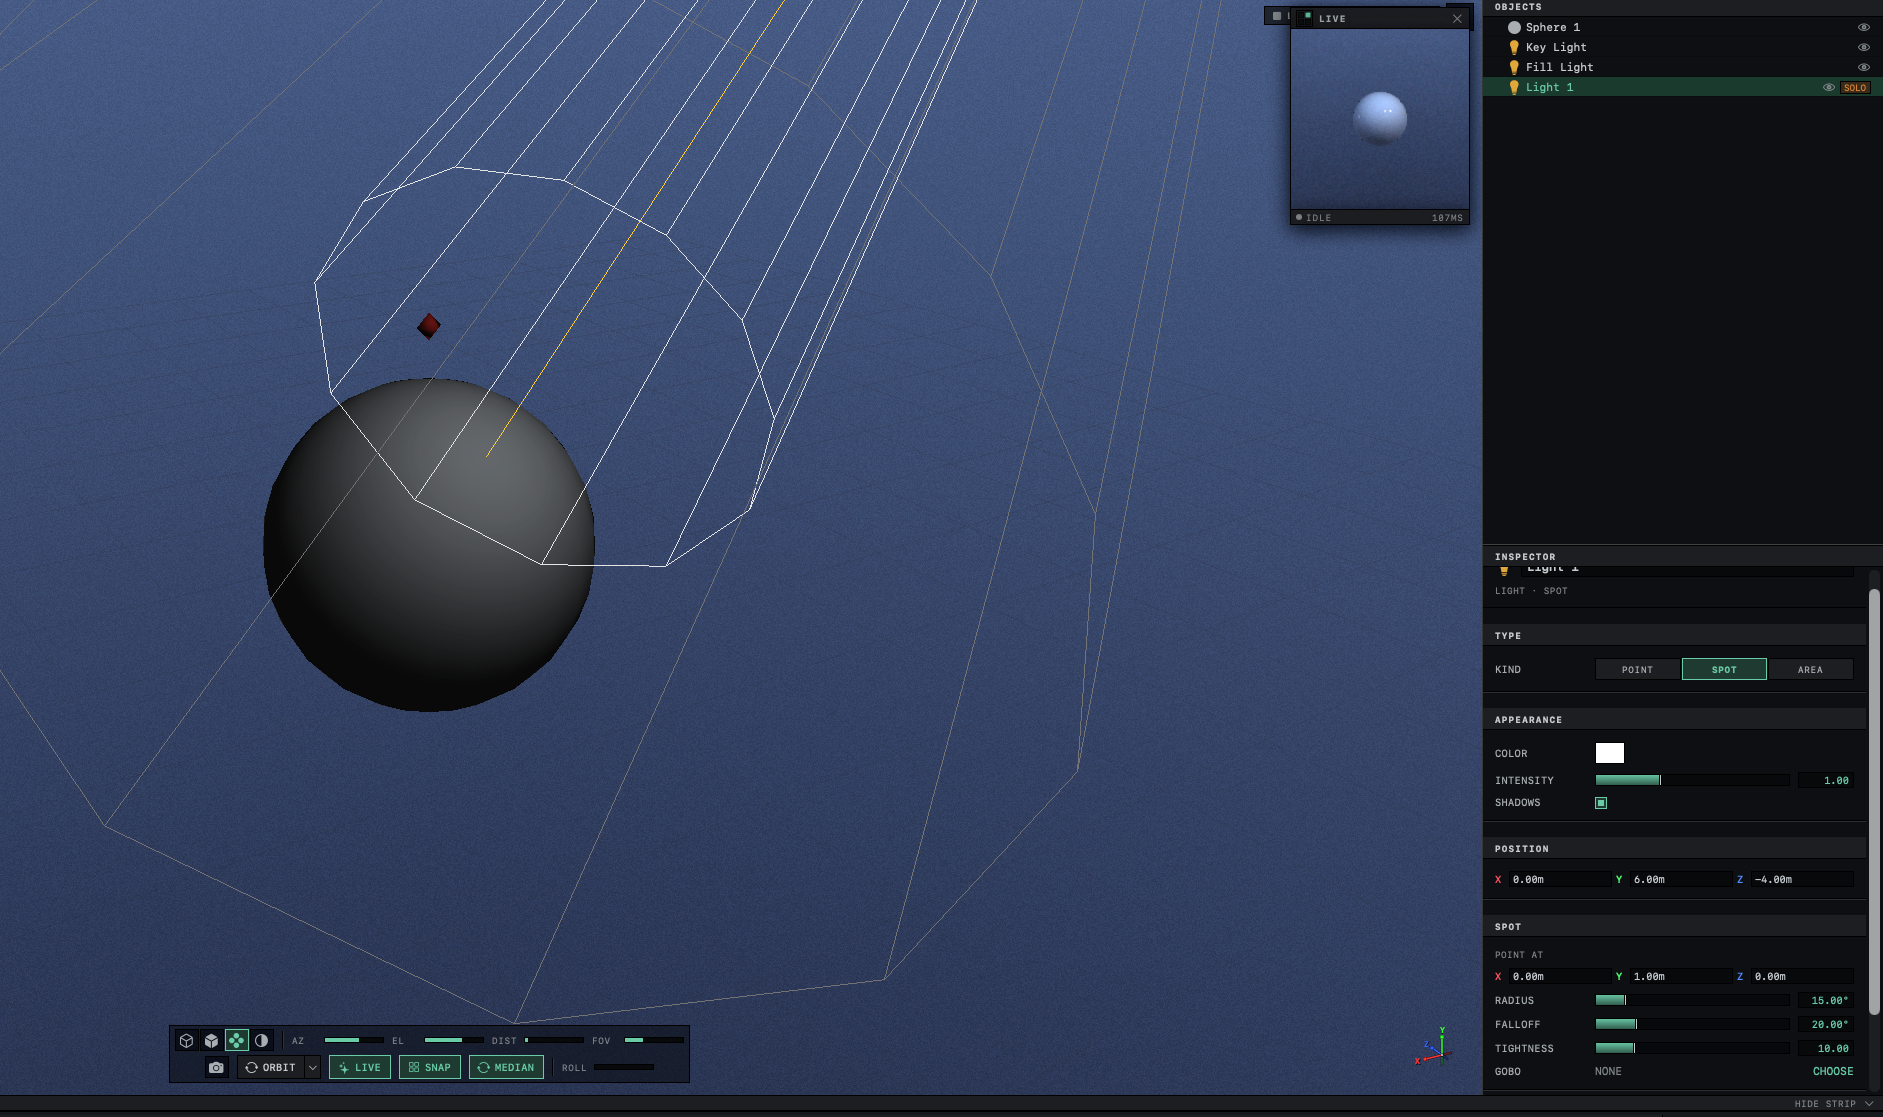
In the INSPECTOR, under TYPE, click SPOT next to KIND.
The SPOT section appears, and a line runs from the light to the point it aims at.
Press
Wand drag the arrows to move the light.The light keeps pointing at the same place while it moves.
To aim it somewhere else, press
Eand drag one of the rings.The light stays in place and swings to point in a new direction.
To aim by numbers, type the point to aim at into the X, Y and Z fields of POINT AT, in meters. POSITION moves the light by numbers the same way.
The column of object buttons at the left edge of the window adds a light too, with the amber button whose name, Add Light, shows when you hold the pointer over it. Right-clicking an empty part of the viewport and choosing ADD LIGHT puts the new light 6 meters above the spot you clicked. The command palette also has ADD LIGHT; press ⌘K and type add light.
Light settings
| Setting | Light | What it does |
|---|---|---|
| KIND | All | POINT shines in every direction from one spot. SPOT shines a cone toward POINT AT. AREA is a flat panel of light facing POINT AT. |
| COLOR | All | The color of the light. |
| INTENSITY | All | Brightness, from 0 to 3. A new light starts at 1. |
| SHADOWS | All | Whether the light casts shadows in the LIVE preview and renders. On for a new light. |
| RADIUS | Spot | The angle from the middle of the beam to its edge, from 1° to 90°. It starts at 15°. |
| FALLOFF | Spot | Widens a second, dimmer cone outline that the viewport draws around the beam, from 1° to 90°. It starts at 20°. It does not change the light, whose beam ends sharply at RADIUS. |
| TIGHTNESS | Spot | How strongly the light gathers toward the middle of the beam, from 0 to 50. |
| GOBO | Spot | An image the spot projects, like a slide in a projector. CHOOSE picks the file. The image appears only in traced pictures, and the viewport draws a plain cone. |
| WIDTH, HEIGHT | Area | The size of the panel, from 0.1 to 10 meters. Both start at 2 meters. |
| SAMPLES | Area | How smooth the soft edges of its shadows are, from 1 to 64. Higher values take longer to render. |
DRAMATIC and BACKLIT set one of their lights brighter than 3. Dragging the INTENSITY slider of such a light brings it down to 3 or less.
An area light gives shadows with soft edges because its light comes from a whole panel. The render looks RAY '95, TERRA '96 and GLIDE '99 trace its shadows from the center of the panel alone, so under those looks its shadows are hard.
When a light is locked, its POSITION and POINT AT fields are dimmed and the gizmo does not move it. ⌘L unlocks it.
Make light fade with distance
A light starts with ATTENUATION set to OFF, so it is as bright 50 meters away as it is 1 meter away. To make it fade, choose a curve under MODE in the ATTENUATION section, then set RANGE, in meters.
| MODE | How the light fades |
|---|---|
| OFF | It does not fade. |
| LINEAR | It dims evenly and reaches nothing at RANGE. |
| INV DISTANCE | It dims fastest close to the light and more and more slowly farther out. At RANGE it has half its brightness. |
| INV DISTANCE² | It stays close to full brightness near the light and has half its brightness at RANGE. Beyond RANGE it dims faster than INV DISTANCE. |
RANGE starts at 5 meters and is hidden while MODE is OFF.
Light the scene with the sun
The sun is part of the environment, and LIGHTING presets do not change it.
- Press
⌘Eto open the ENVIRONMENT BROWSER. In the SUN section, click SUN LIGHT to turn it on.
Objects are lit from the direction of the sun, and LIGHT INTENSITY becomes available.
Set AZIMUTH to turn the sun around the scene and ELEVATION to raise it above the horizon.
The light on the objects shifts with the sun.
The sun always casts hard shadows, and it lights the scene whether or not VISIBLE SUN DISC draws it in the sky. Clicking one of the sky presets that come with Orbit turns SUN LIGHT off again. How to set the color of the sunlight, and the rest of the sun's settings, is covered under Place the sun.
Lights in the viewport and in the render
The viewport lights the scene with at most eight lights. With SUN LIGHT on, the sun takes the first place, and the other lights fill the rest in the order they were added. A light past the eighth still lights the LIVE preview and the render. The viewport also draws no shadows, and it lights objects from the center of an area light, as if it were a point light. The viewport gives the reasons for both.
To see what one light contributes, select it in OBJECTS and click SOLO on its row. Orbit renders a small picture lit by that light against a black sky. With SUN LIGHT on, the sun lights the picture too.
Light settings and undo
Moving or aiming a light with the gizmo is a step of its own for ⌘Z. The settings in the INSPECTOR of a light, apart from its name, are not. Undo reverses them together with the change made before them, and changing them does not mark the scene as unsaved, so press ⌘S after such a change. What undo covers lists the other changes that behave this way.