Sculpt a terrain by hand
In the TERRAIN EDITOR you paint on a map of the terrain seen from above to raise hills, dig hollows, soften bumps and level plateaus. Filters work on the whole terrain at once, for example to blur or sharpen it, or to sink its edges and leave an island. Each change shows on the terrain in the viewport.
Choose the recipe and seed of the terrain first, as in Build a terrain. Changing either one later rebuilds the land and loses the sculpting.
Open the terrain editor
Click the terrain so that it alone is selected. In the INSPECTOR, scroll to EDITOR and click EDIT TERRAIN….
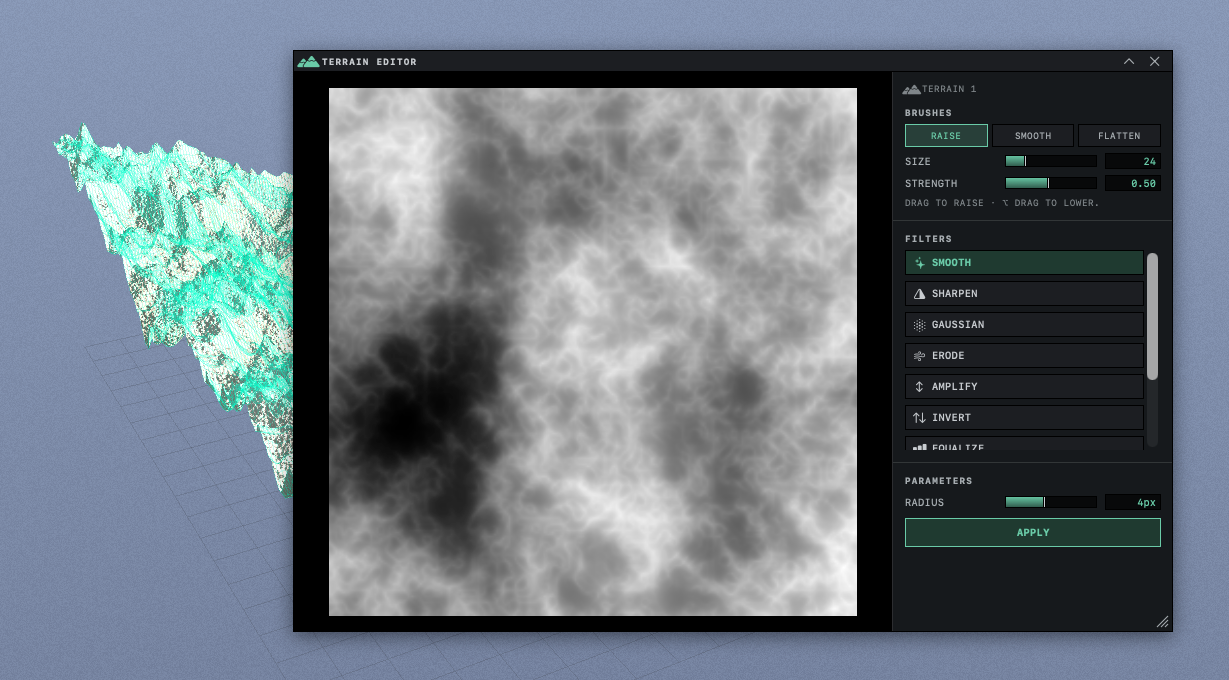
The TERRAIN EDITOR panel opens over the window. On the left is the map of the terrain, where black is the lowest ground and white the highest. The name of the terrain appears at the top of the column on the right.
The panel floats, and the viewport behind it keeps working, so you can move the camera while you sculpt. Drag the top of the panel to move it and the grip in its bottom right corner to resize it. It opens at the same place and size the next time. The X at the top of the panel closes it.
The map runs from black to white, whatever the actual height of the terrain, so it shows which ground is higher than which, but not how tall the terrain is. If the map reads Select a terrain primitive, then re-open this sheet., the selection is not a single terrain. Select one terrain, close the panel and open it again.
Paint with a brush
Under BRUSHES, click RAISE.
The button lights up, and the line under the sliders reads DRAG TO RAISE · ⌥ DRAG TO LOWER. A ring follows the pointer over the map and shows the area the brush covers.
Drag across the map.
The ground under the ring rises, most at the center of the ring and not at all at its edge. The terrain in the viewport rises with it while you drag.
Hold Option and drag.
The ground under the ring sinks.
Click SMOOTH and drag over rough ground.
The bumps under the brush relax toward the ground around them.
Click FLATTEN, press on the map where the ground has the height you want and drag outward.
The ground under the brush moves toward the height of the point where the stroke began, which makes a level shelf or plateau.
SIZE sets the radius of the brush, from 4 to 96 points of the terrain grid, and starts at 24. On a finer grid, set in HEIGHTFIELD, the same SIZE covers a smaller part of the map. STRENGTH sets how much each pass of the brush changes the ground, from 0.05 to 1.00, and starts at 0.50. Both return to these starting values each time the panel opens.
Clicking the lit brush button turns it off, and dragging on the map then does nothing. ⌘Z removes a whole stroke, from where you pressed to where you released.
Apply a filter
Under FILTERS, click a filter.
The map shows the terrain with that filter applied at its starting settings, and PREVIEW · APPLY TO COMMIT appears at the bottom of the map. The terrain in the viewport does not change yet.
Under PARAMETERS, adjust the sliders.
The map updates a moment after each change.
Click APPLY.
The filter is applied to the terrain, the terrain in the viewport changes and the preview label disappears.
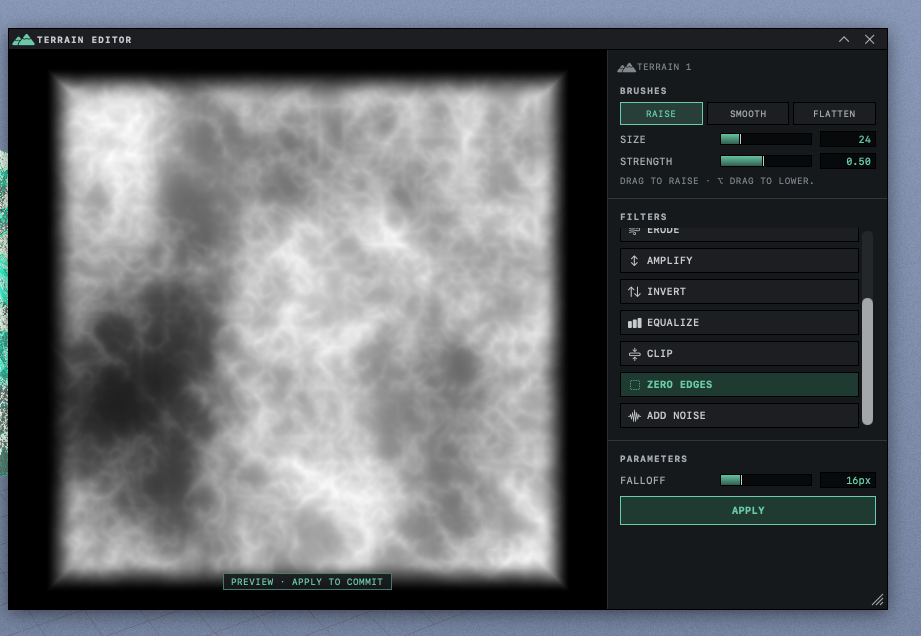
SMOOTH is already chosen when the panel opens, so clicking it then shows no preview until you move its slider. Nothing reaches the terrain until you click APPLY, and the panel has no separate cancel button. To leave a preview without applying it, close the panel. Starting a brush stroke also clears the preview, and the brush paints on the terrain as it was. Clicking APPLY twice applies the filter twice, and ⌘Z takes back one click at a time. Choosing another filter sets its sliders back to their starting values.
| Filter | Effect | Settings |
|---|---|---|
| SMOOTH | Blurs the terrain, softening peaks and bumps | RADIUS |
| SHARPEN | Strengthens small differences in height, so ridges and edges look crisper | AMOUNT, RADIUS |
| GAUSSIAN | The same blur as SMOOTH with a larger range of RADIUS | RADIUS |
| ERODE | Wears down steep slopes and pushes bumps downhill. It does not simulate running water. | STRENGTH |
| AMPLIFY | Makes every height taller or shorter | AMOUNT |
| INVERT | Turns peaks into valleys and valleys into peaks | None |
| EQUALIZE | Spreads the heights evenly between the lowest and the highest | None |
| CLIP | Cuts off the ground above CEILING and fills in the ground below FLOOR, leaving flat tops and floors | FLOOR, CEILING |
| ZERO EDGES | Brings the ground near the four edges toward zero height, reaching it at the border, for an island | FALLOFF |
| ADD NOISE | Adds a layer of random bumps | AMPLITUDE, SCALE, OCTAVES |
ADD NOISE at the same settings adds the same pattern of bumps every time, on every terrain, so applying it twice doubles that pattern. FLOOR and CEILING of CLIP are measured on the heights of the terrain before HEIGHT SCALE multiplies them. On a MOUNTAINS terrain most of those heights lie above 1, and the starting CEILING can flatten much of the land. Check the preview before you click APPLY.
ZERO EDGES with a large FALLOFF leaves a small island in the middle. To surround it with sea, add a water plane and raise it until it covers the low rim (Add water and choose its waves).
Keep the sculpting
Brush strokes and filters are saved with the scene. Some settings in the INSPECTOR build the land again from its recipe and lose them, and Settings that erase sculpting names those settings and the ones that are safe to change.
The terrain stays where it was placed while you sculpt, so reshaping its lowest ground can leave it floating above the ground or sunk into it. Right-click the terrain and choose DROP TO GROUND to set it back down.
Ranges and starting values for every brush and filter setting are in Terrain settings, brushes and filters.