Build a terrain
Pick the kind of land a terrain grows from, such as mountains or rolling hills, and reroll it until the shape fits the scene. Sliders set its height and width. TERRAIN SHADING colors the ground by height, either from dark low ground up to pale peaks or in layers of rock.
Settle the shape before you sculpt the terrain by hand. Several of the settings on this page rebuild the land from scratch; Settings that erase sculpting names them.
Add a terrain
Click ADD OBJECT in the toolbar and choose TERRAIN.
A square of mountains 20 meters on each side appears at the center of the scene with its lowest point on the ground. It is selected, and the INSPECTOR shows the sections TERRAIN, HEIGHTFIELD, NOISE, TERRAIN SHADING and EDITOR.
A right-click on empty ground in the viewport opens a menu with ADD TERRAIN, which places the terrain at the point you clicked. A new terrain wears the Landscape material, which already colors it by height.
Choose the kind of land
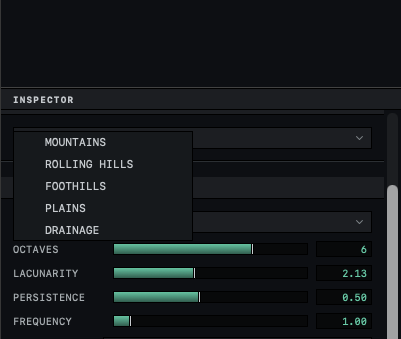
In NOISE, click the menu that reads MOUNTAINS and choose another recipe: ROLLING HILLS, FOOTHILLS, PLAINS or DRAINAGE.
The terrain is rebuilt as the new kind of land.
Click REROLL.
The number after SEED: changes and the land takes a new shape. Click it as many times as you need.
⌘Z undoes a recipe change or a REROLL one at a time, which brings back a shape you passed.
DRAINAGE starts from a branching network of rivers, cuts a valley along each channel and fills the ground between with hills, so its riverbeds run downhill. It adds five sliders to NOISE. Raise DENSITY for more channels. CARVE DEPTH and CARVE WIDTH set how deep the channels cut and how wide the valleys open. RELIEF sets the height of the hills between the channels, and DETAIL sets how much smoother the valleys are than the hills.
Change the amount of detail
The four sliders above SEED: in NOISE change the land within the recipe you chose.
| Slider | Default | Effect |
|---|---|---|
| OCTAVES | 6 | Each step adds a layer of smaller bumps on top of the larger ones. |
| LACUNARITY | 2.13 | How much finer each layer of bumps is than the one before. |
| PERSISTENCE | 0.5 | Higher values give smoother ground. |
| FREQUENCY | 1.0 | Raising it fits more hills and peaks across the terrain. |
The menu in HEIGHTFIELD sets how many heights the terrain is built from, from 64 × 64 to 512 × 512. Orbit starts at 256 × 256. A finer grid shows smaller detail but takes longer to rebuild after each change. At 512 × 512 the terrain has about 522,000 triangles, four times as many as at the default. The grid cannot go beyond 512 on a side. Switching resolution keeps the same land and draws it in more or less detail.
Set the height and the size
In the TERRAIN section, HEIGHT SCALE multiplies the height of every point, from 0, which lays the land flat, to 20. It starts at 3.
WORLD EXTENT X and WORLD EXTENT Z set the width of the terrain in meters along each direction, from 1 to 200. Widening the terrain stretches the same hills over more ground without adding any, so raise FREQUENCY as well if a wider terrain should have more hills.
Color the terrain by height
Select the terrain and scroll the INSPECTOR to TERRAIN SHADING.
The first row reads ELEVATION ZONING ENABLED on a new terrain. If it reads ENABLE ELEVATION ZONING, click it.
Leave BANDS chosen. Under COLOR STOPS, click the color swatch of STOP 1 (LOW) and choose a color.
The lowest ground takes that color. STOP 2, STOP 3 and STOP 4 (HIGH) color the ground above it, up to the highest peak.
Drag the POS slider of a stop to move its color up or down the slopes.
At 0 a color sits at the lowest point of the terrain, and at 1 at the highest.
BANDS spreads the four colors over the height of the terrain itself, so they follow it when you move it or change HEIGHT SCALE.
STRATA lays the ground out in beds of rock, the way cliffs show layers. The four stop colors take turns as the colors of the beds, and the POS sliders are dimmed because they have no effect. BED SCALE sets the rough thickness of a bed in meters and WAVINESS how much the beds bend. Steep faces take the SCREE color, blending in around the slope set by THRESHOLD. Click ENABLE SNOW to cover flat ground above SNOW LINE while the cliffs stay bare.
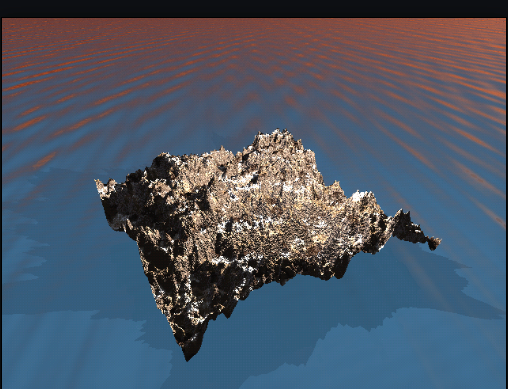
The beds of STRATA are fixed to heights in the scene, not to the terrain. Moving a terrain up or down changes which beds show on it, and two terrains at the same height share the same beds.
Settings that erase sculpting
Brush strokes and filters from the terrain editor change the heights of the terrain directly. Choosing another recipe, moving any slider in NOISE, changing the HEIGHTFIELD menu or clicking REROLL rebuilds the land from the recipe, and all of that sculpting is lost. ⌘Z brings it back. HEIGHT SCALE, WORLD EXTENT X, WORLD EXTENT Z and TERRAIN SHADING leave the sculpting in place.
The range of each setting is in Terrain settings, brushes and filters. A lake or sea around the terrain is a separate water plane, raised until it floods the low ground, as Add water and choose its waves shows.